
Curiosities of the Studio, Take 1
Are you a curiosity seeker?
I am and I knew you would be too!
So, I’m creating a series with you in mind. Curiosities of the Studio blogs will be our sharing time when you get to peek over my shoulder and see how I create my art, illustrations, and surface designs.

So, let’s dive into today’s edition…
How do I create a repeating pattern design?
First, a repeating pattern is a design that repeats endlessly.
These types of seamless patterns are wonderful for wallpaper, fabrics, wrapping paper, and many other uses when you want the design to go on and on.
I start with an inspirational idea of what I wish to create such as the stylized floral design we’ll be working on today. When planning the direction of the design, I also try to imagine what surfaces it may be printed on, how much detail, and a good scale for that use. Let’s choose drapery and bedding which would lead me to visualize a pattern on a larger scale, that would usually be viewed more from a distance.
Designs can be created in many different ways…
from traditional sketching and painting, photography, and scanning to completely digitally rendered art.

Photo Inspiration and Finished Repeating Pattern Design.
In our muted floral design we’ll be creating, I started with my phone and photography. I used Adobe’s Capture app to create several black and white images to inspire a design and create shapes I can pull out. This one inset on top of the finished pattern, is one of the ones I used. Can you spot some of the shapes I chose?
Now, I’ll start working in Adobe Illustrator.
This software allows me to create vector design that can be easily scaled from small to large without losing the quality of the artwork.
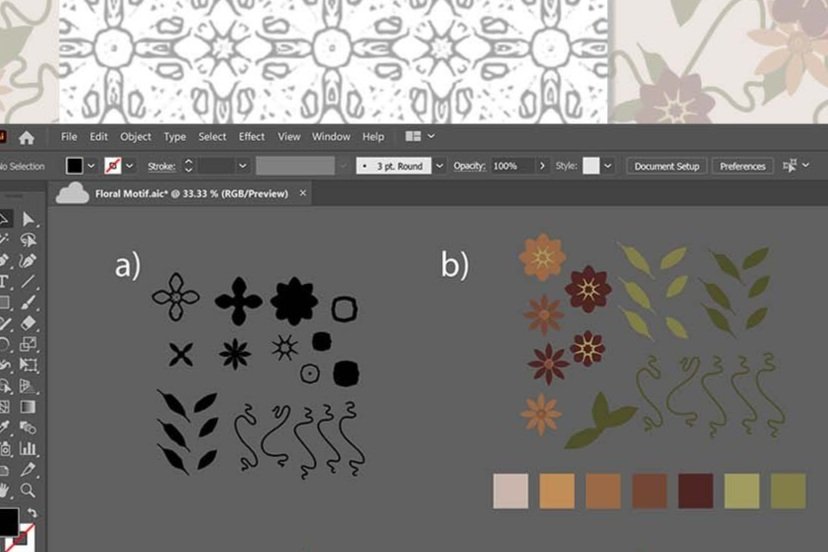
This is a screenshot image of steps a) and b).
I gathered various elements from the black and white images, in addition to creating a few others for the design, a).
Then, it’s time to start combining the shapes to create flowers and add color from the palette I created, b).
These now become what are called motifs for the design.
I’ll continue to build them into larger, grouped motifs until I’m ready to start arranging them to create my pattern, c)
In the next step,
I’ll make an artboard to work on and create a background color on top of it.
This colored square will be the border or bounding box of my design. The motifs are arranged onto the square starting on the top and left side, placing them to fall off the board, some by a little and some by a lot, d).

This is a screenshot image of steps a) through f).
Now, This is where the repeat is built, e).
Everything that is extending over the left side, will need to be copied and moved to the right side the exact dimensions of the bounding box. Then everything across the top will be copied to the bottom the same way. Motifs are then added to the inside of the box being careful to not extend them over the border, f).
I’ll then continue to fill and build the design
keeping in mind that if any motif needs to go over the edge, it will need to be copied to the opposite side for the pattern to work, g).

This is a screenshot image of steps g) and h).
Once the design is complete,
I’ll create a swatch to test the endless pattern. Here, I can scale the design up and down to see how it looks. I can then adjust anything that I feel will create better balance and look closely to make sure that nothing was cut off as the design repeats, h).
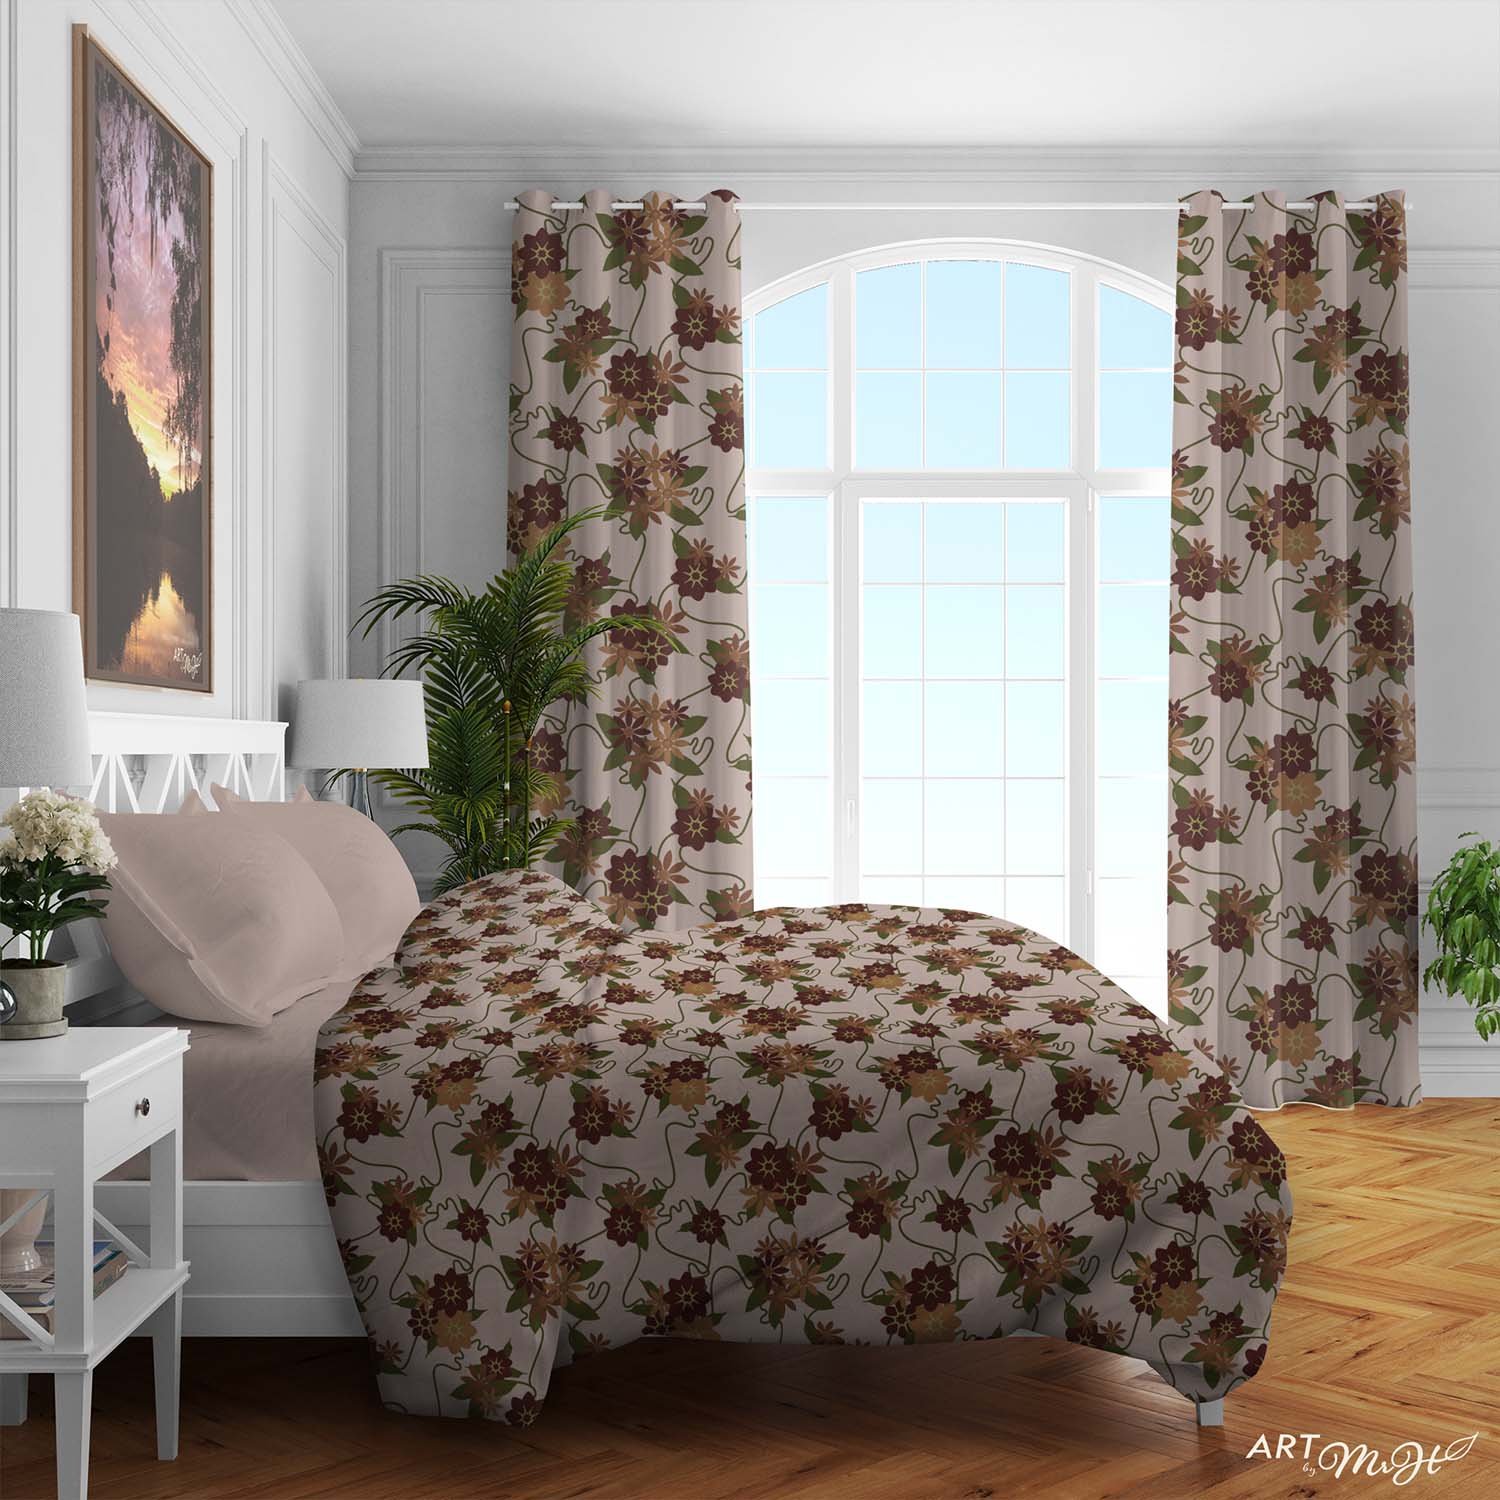
The new seamless design can now be published to any surface I choose.
The design looks so wonderful in this mock-up showcasing bedding and drapery. What do you think about our finished design?
Thanks for stopping by the studio! And remember…
Whether you’re choosing placemats for the table, a new dress, or a plant for the patio, choose what you love. It’s your life, your style, embrace it. Celebrate you!
Tap the button below to send me a note if you’re interested in a consultation or collaboration. I would love to help you find your bliss.
Thank you for joining along in the journey!